Art, K-12

3d Printed Lithophanes

I asked a couple of people on Twitter if I could share their projects today.  I have been fascinated watching them post pictures of their 3d printed lithophanes.  In the past, lithophanes were traditionally etched in thin, translucent porcelain that revealed the artwork when backlit.  3d printing technology, however, allows for lithophanes to be created using filament with very similar results.

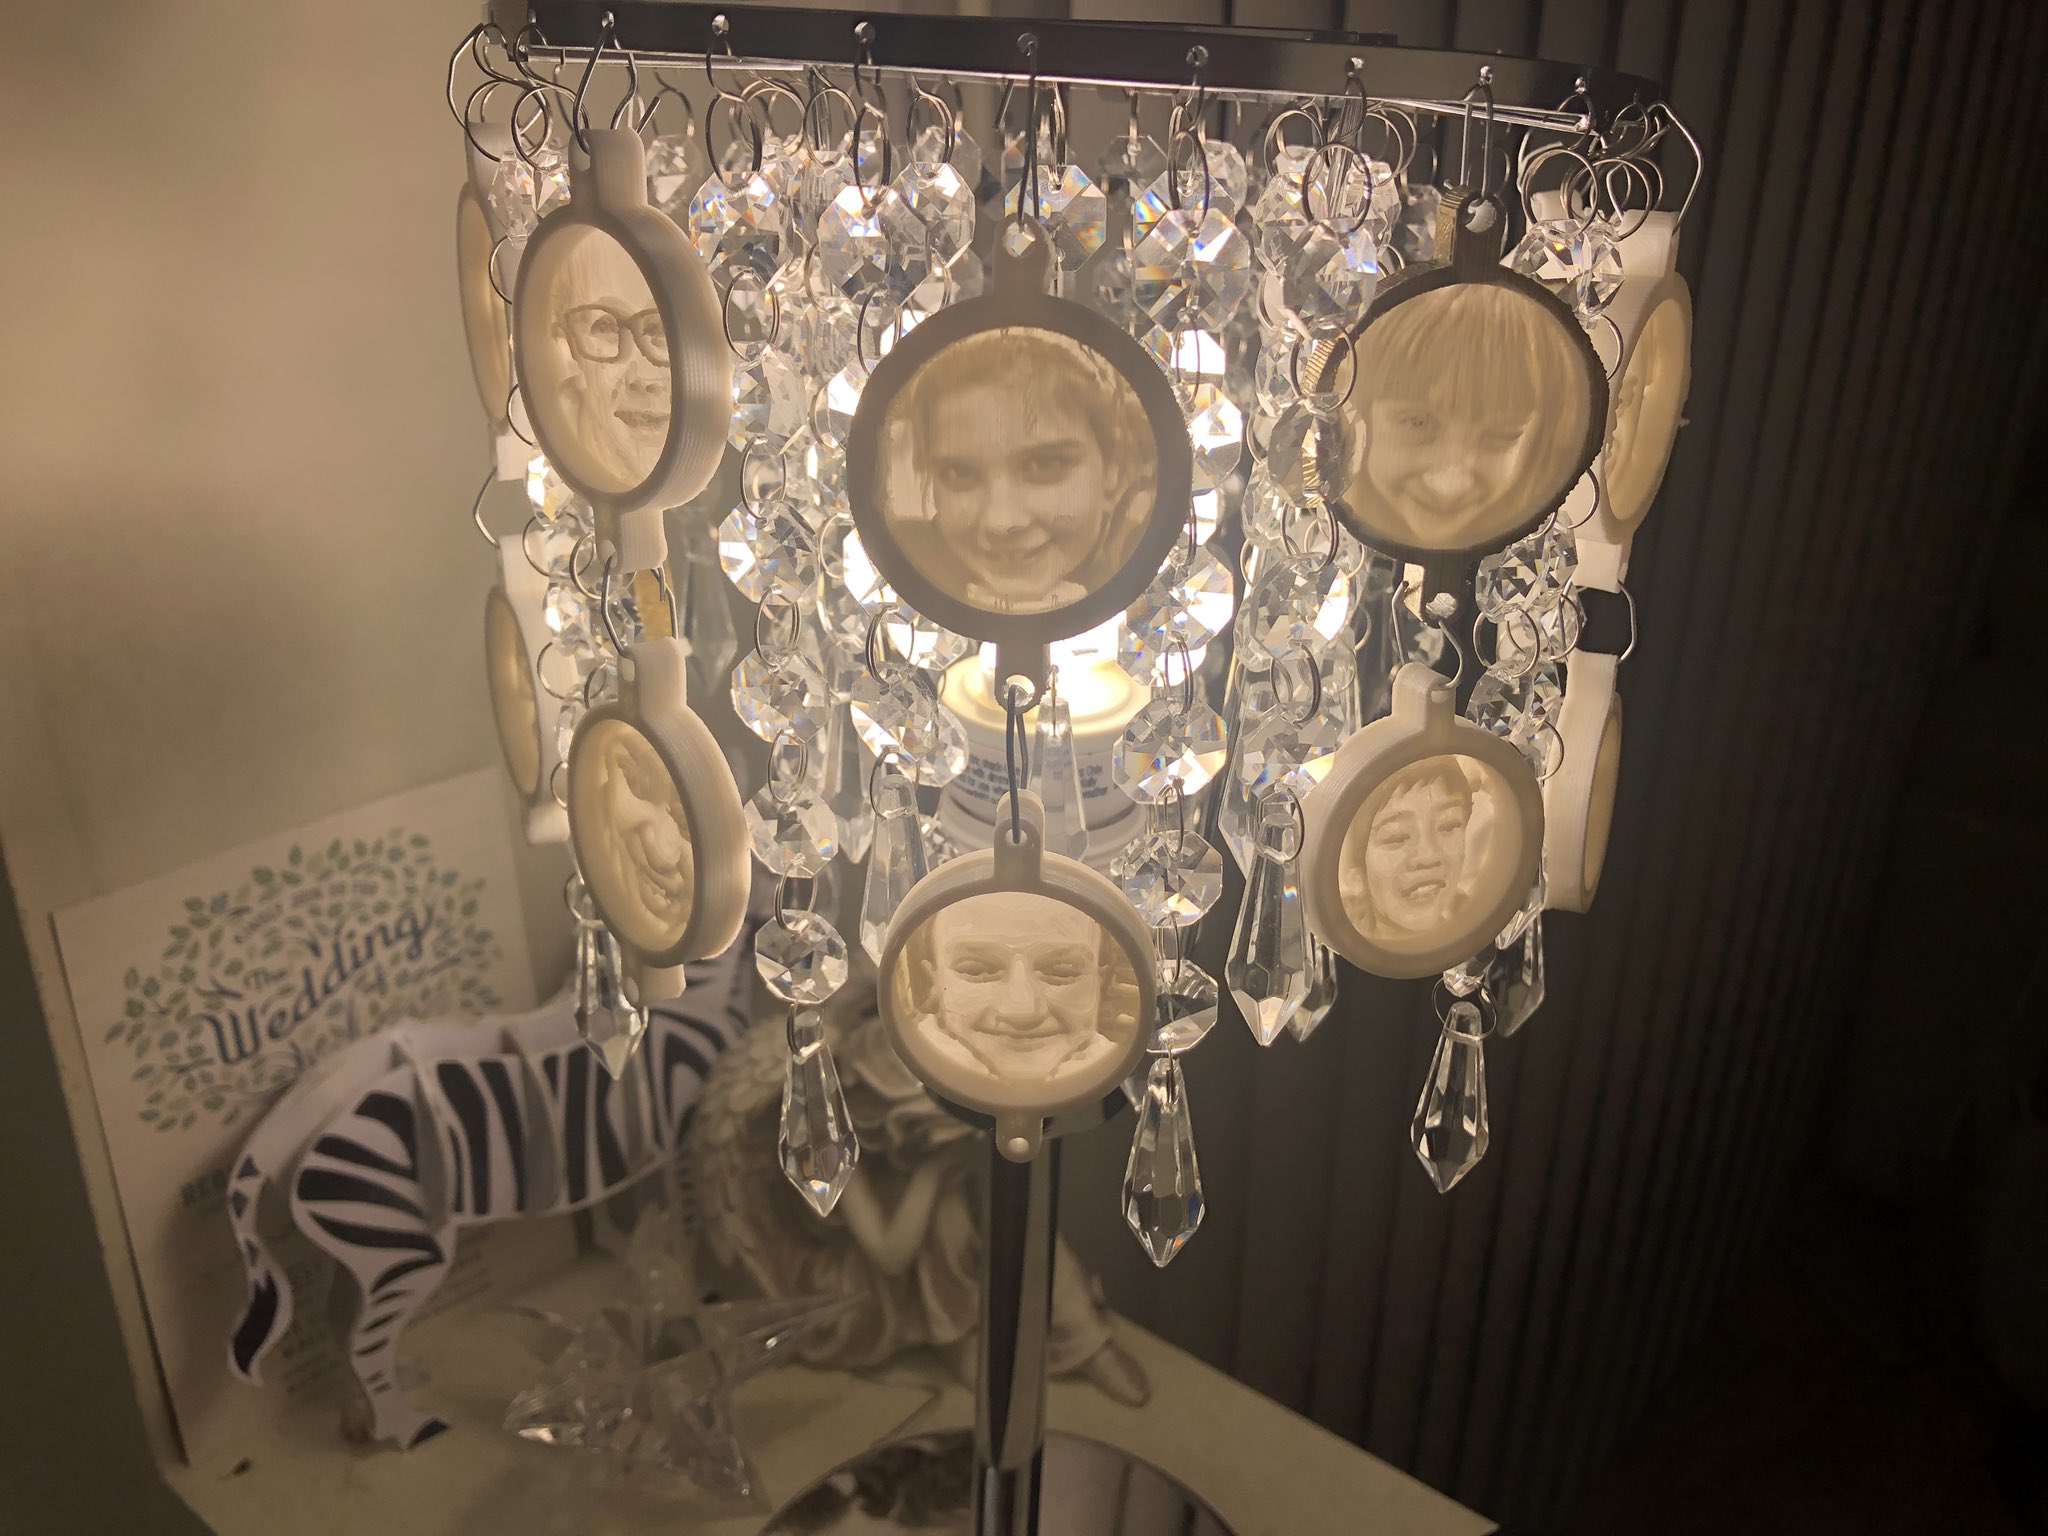
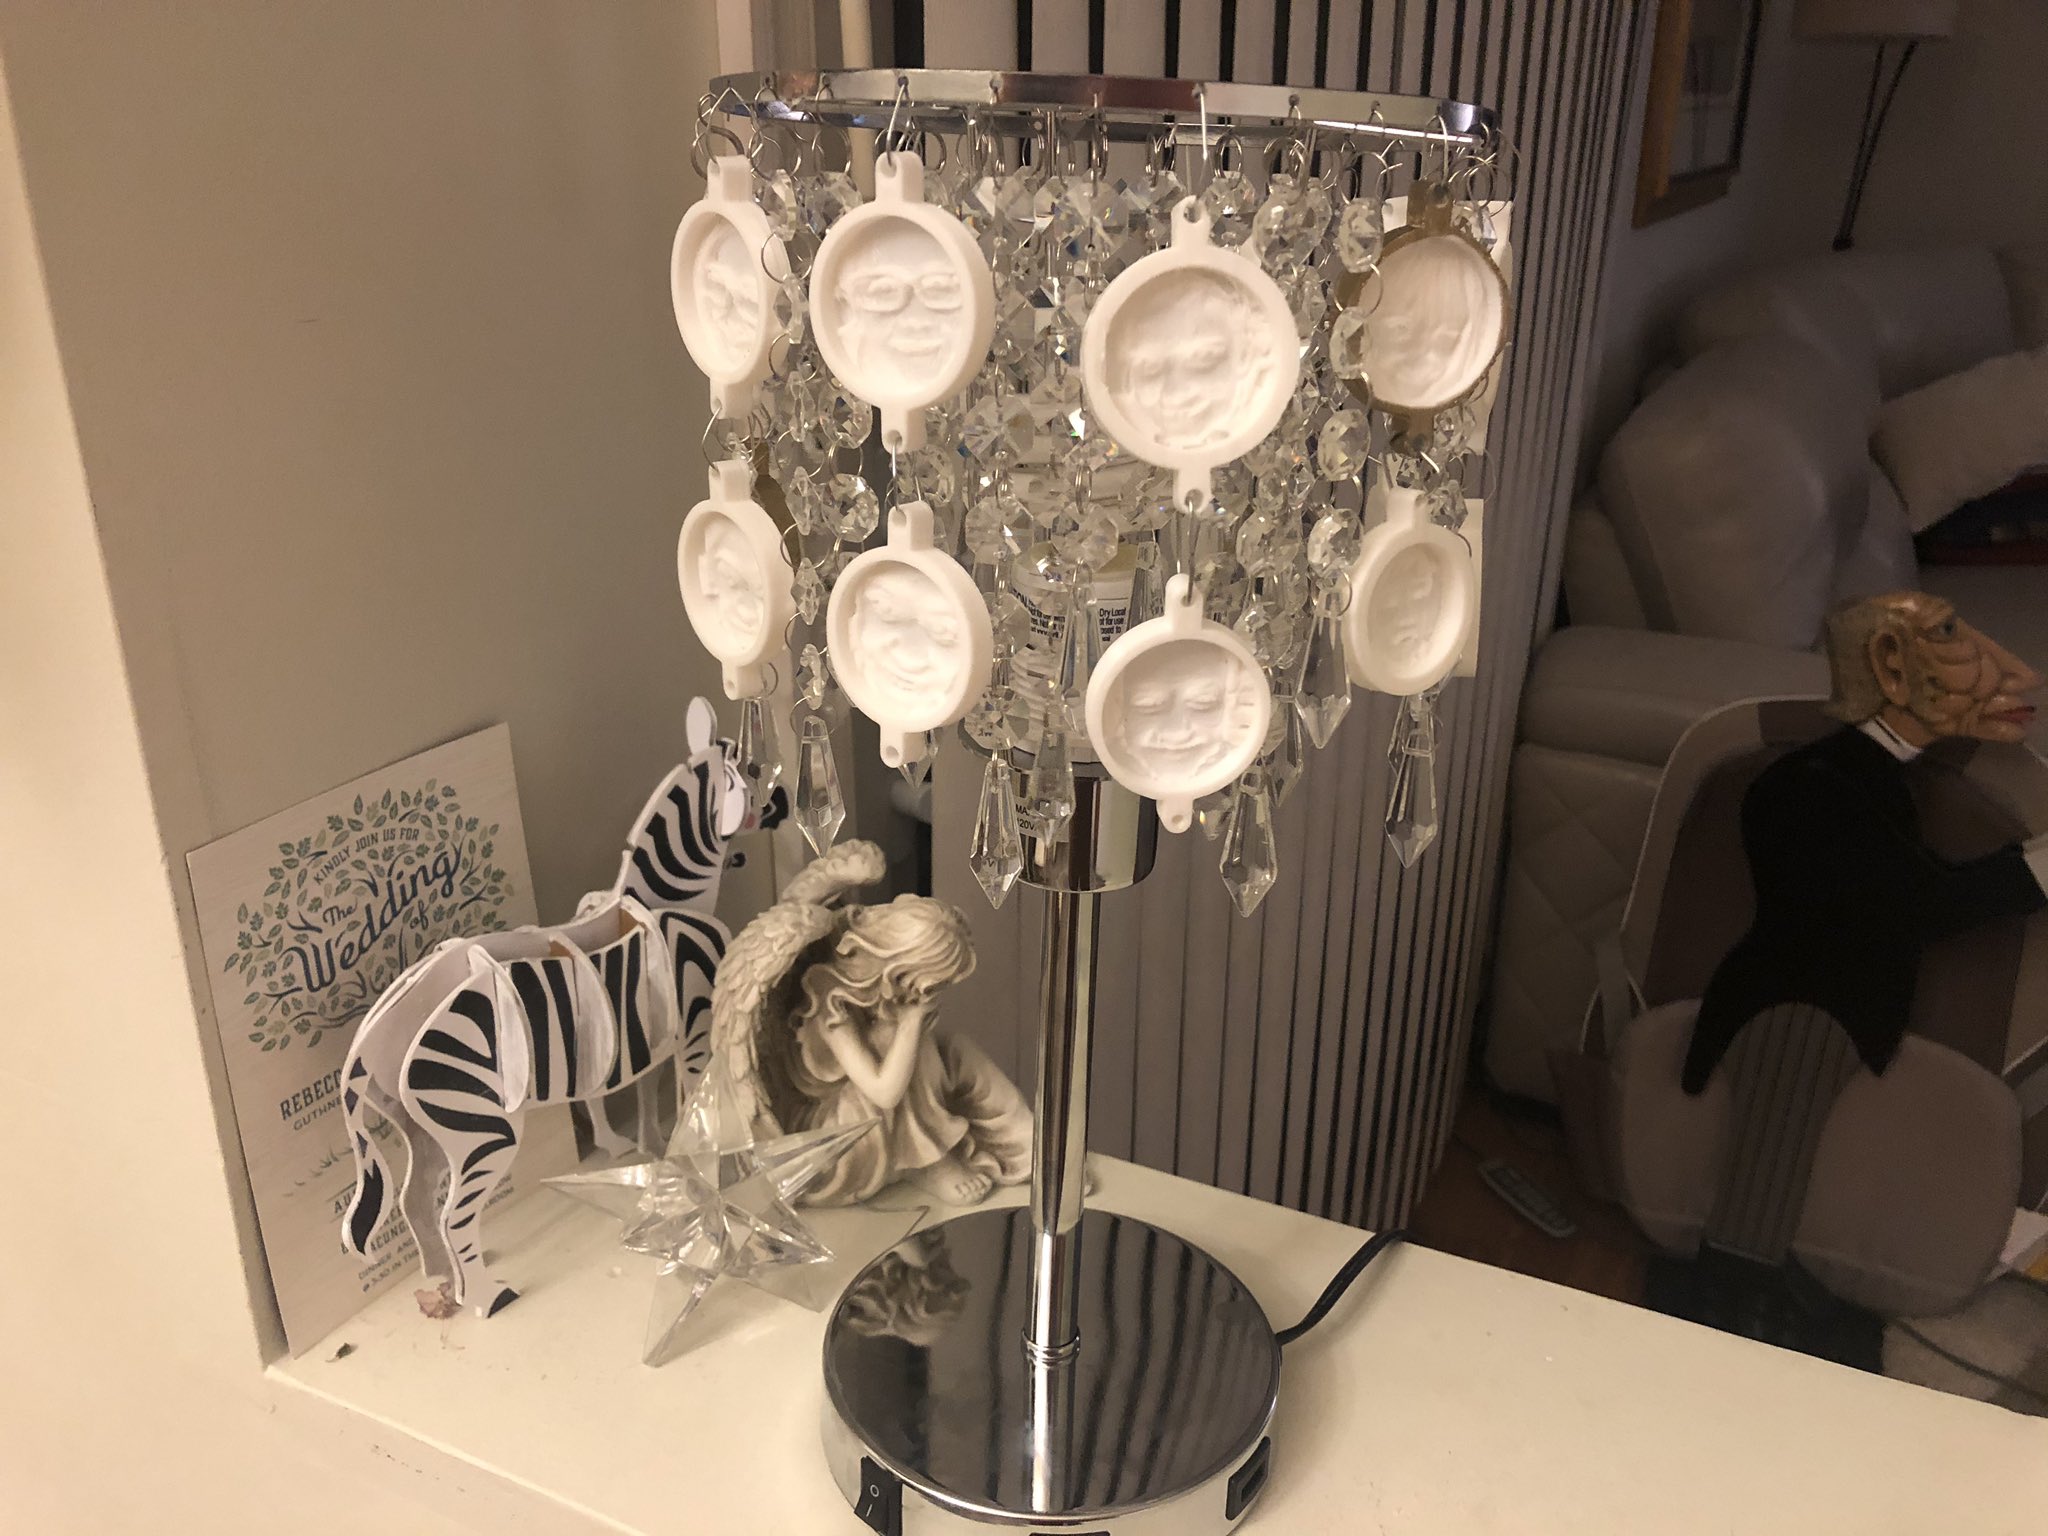
Julia Dweck (@GiftedTawk) has been working on 3d printing lithophanes with her students to showcase their individuality.  As you can see in the first picture below, the lithophanes are not truly visible without light.  The second photo displays her amazing student photos once the lamp has been turned on.  Follow Julia if you aren’t already – she is always doing incredibly creative projects!
Image
3d Printed Lithophanes courtesy of @GiftedTawk
Image
3d Printed Lithophanes courtesy of @GiftedTawk

Rob Morrill (@morill_rob) has also been working with lithophanes.  His designs are in honor of Black History Month.  You can see his Rosa Parks example below.  I also suggest you take a look at his Nina Simone and Shirley Chisholm lithophanes available on Thingiverse.

Rob has provided step-by-step instructions for creating lithophanes with Tinkercad here.

Most of the lithophane DYI articles, including Rob’s,  recommend using this free online lithophane generator to make your photos into an .stl file.  Once you have this file, you can use any slicing program, such as Cura, to prepare the file for 3d printing.  This Sparkfun article has basic instructions.  For more complex “tweaks” that you may want to make in your preferred slicing program, such as setting the layer height and infill, this Instructable may help you out.  Most of the sources I looked at recommend using white PLA filament.  Other colors may work, but the translucency will not be as consistent.

Let me know if you’ve done a lithophane project!  I’d love to see the many applications of these unique form of art.


3-12, Art, Computer Science, Math

Turtlestitch

One of the many things I didn’t know anything about when I first started teaching at Advanced Learning Academy was working with textiles.  My skills were limited to hand-sewing buttons.  Even though my in-laws had given me a sewing machine a decade ago, I still didn’t know how to thread it or why in the world I needed a bobbin.

I had seen the Turtlestitch Kickstarter page, and was intrigued by the idea of using coding to design for textiles, specifically for embroidery machines.  My colleague and I decided to order a combo sewing/embroidery machine (Brother SE600) for Zorro Astuto, and it arrived about a month before I retired.  I took it home for the Thanksgiving Break to try it out and, with the help of a lot of YouTube videos, figured out how to use the machine.  Although I was by no means an expert, I begged my family to buy me one for Christmas.  I knew I would suffer from fabrication withdrawal once I was no longer teaching in Zorro Astuto, and the Brother SE600 seemed far more practical than adding a 3d printer or laser cutter to my personal collection – though I’m certainly not ruling those out for the future 😉

I’ve made a lot of mistakes with this machine, which makes sense since I knew zero about it when I started.  For example, I didn’t know that you need to put a stabilizer behind your fabric (sometimes even on top of it, depending on the fabric), and that there are many, many different types of stabilizers.  The type of fabric, or other medium, and the types of stitches will determine your stabilizer and needle types.  This blog post was really helpful.  I have also learned quite a bit about how to service my machine as pieces of thread and fabric have gotten caught inside when I didn’t stabilize correctly or a needle broke.

You can download embroidery designs, but most of them will cost you money.  Finding just the right software for creating your own designs can be overwhelming.  That’s why Turtlestitch is such a genius idea.  Using block coding, you can create your own design and export it to a USB – for free.

To start, I decided to choose from one of the many free designs already available on the Turtlestitch site.  The project is called, “Twisty.”  Because I wanted my design to be in different colors, I decided to remix the original by randomizing the RGB colors.  Each time I run the code, the colors will come out different.  However, once I like the colors, I can export the file as a .dst, and those colors will be the set used for the embroidery file. The machine lists each corresponding Brother Thread color number as it is needed, and I was fortunate in this case, as almost every single thread color was part of my original package of threads.turtlestitchtwisty

My machine will stop for each color change, which turned out to be a bit demanding on this project, but I’m thankful for the automatic needle threader!

turtlestitchtwisty2
Turtlestitch “Twisty” remixed, stitched on felt, using tear-away stabilizer on bottom

I love using coding with math, and there are lots of possibilities here.  There are a few fractals projects already on the site, as well as tessellations.  If you follow the @turtlestitch Twitter account, you will see examples of student projects, including jewelry (my next personal challenge).

3-12, Creative Thinking, Student Products

Recycled Toys

Last nine weeks, I co-taught an Electronics class for our 7th grade elective.  I say “co-taught” even though my colleague, Kat Sauter, actually did nearly all of the planning and teaching – and I learned nearly as much as the students.  One of the projects that the students did was to take apart old battery-operated toys to identify the different electronic parts.  After dissecting the toys and making posters that illustrated diagrams of the inner workings, the students could make new toys using the parts and any of the tools we had in Zorro Astuto.  This group was particularly proud of the musical toy they transformed into a UFO, complete with 3d printed alien pilot, laser cut acrylic laser beam, and very confused 3d printed cow.

One of the resources Kat used for ideas was this “Toy Take Apart” project from the Exploratorium.  You can find some more ideas in this article from User Generated Education.  You can also see some other fun examples by looking at #toydissection on Twitter.

IMG_9014IMG_9015

Creative Thinking, Critical Thinking, K-12, Teaching Tools

Tinkercad Design Slams

For anyone new to 3d design, Tinkercad is one of the best options out there.  This free online design tool is an excellent introduction to creating .stl files that can be saved and imported into your preferred 3d printer slicing software.  When I think of the dearth of 3d printing/design thinking resources that could be used in schools, especially in elementary, five or six years ago, it is heartening to see all of the curriculum, tools, and tutorials that have popped up since the days when my colleague and I started using City X with our students.   Tinkercad has been a huge contributor of these resources, making it very educator-friendly.

Last November, the Tinkercad blog featured a post on “Design Slams”  that has links to curriculum that was developed for 3 different grade bands: preK-5, 6-8, and 9-12.  You can use these as starting points to integrate STEAM in your classroom and/or you can choose to enter the #AutodeskMakeItReal contest, also linked in Kellyanne Mahoney’s post.  The themes of these units (Make for Everyone, Make it Green, and Make Justice, respectively) all have the common goal of teaching students to think about how they can impact their communities with design thinking.

New to Tinkercad?  Don’t forget you can go to the “Learn” button at the top of the site to access tutorials to help you get started.

printer-4348147_1920
Image by ZMorph3D from Pixabay


Education

Embracing Change

This is Yeti, the 3-year-old bulldog we adopted last September.  As you can see, Yeti likes the laundry basket.  I kind of like it, too, because when Yeti falls asleep with his head propped up he doesn’t snore as loudly.  Win/win.

yetibasket

Unfortunately, Yeti has some kind of leg injury still to be determined.  Despite his pain, he insists on climbing into the laundry basket.  He has also chewed one side of the basket down to sharp plastic points which make it very possible he will re-neuter himself if he isn’t careful.

My husband pointed out, as I bemoaned the lack of a perfect bed for a bulldog who likes high sides but needs a lower entrance that won’t slice off any appendages, that I do work in a Maker Space now.  And I have tools.  And I teach students how to solve problems using Design Thinking.

I guess you can tell where this is going.

We are beginning the last nine weeks of this school year – my first year in this secondary maker space.  It has been a year of a lot of learning, and I am about to do a whole lot more.  My students are selecting their own projects this nine weeks, and chances are I won’t have the slightest idea how to do any of them, much less my own project on designing and building a bed for a finicky bulldog.

But that’s how I roll.

All of the horrible teachers I had in my life had a couple of things in common – they were pretty sure of themselves and were terrified of change.  I don’t subscribe to the notion that teachers need to be experts or that rigidity improves learning.  It helps to know your topic, of course.  But it’s more important to have relationships with the students and to be willing to learn –  with them and from them.

So, we’re all going to be applying what we’ve learned this year.  The students will give me feedback, and I’ll do the same.  We will consult experts and try not to cry or give up when we make mistakes.  I will be chronicling my engineering design process just as I ask them to keep their own journals.

By the end of May, Yeti will probably still be sleeping in his dilapidated laundry basket.  Because that’s how stubborn bulldogs roll.

But no one will be able to say that I didn’t try.

6-12, Art, Creative Thinking, Science

Biodesign

In the past, I have taught students about biomimicry/biomimetics, in which designers use inspiration from nature to create new products.  (The Youth Design Challenge is a great place to find resources for this.)  Biodesign takes things one step further by actually incorporating nature, often still living, into innovative artifacts that can be purely for decoration or serve specific purposes.

I first became aware of biodesign when I ran across a website for The Nest Makespace.  The unusual images on the home page intrigued me.  (I admit that I thought the “bioyarn” designs were actually made out of worms, but it turns out that it’s probably more like this material.)

The Nest Makespace offers some fascinating project ideas here.  I am hoping that more lesson plans will be linked soon.  In the meantime, you can find more suggestions on the Resource page.

For a “Peek at the Possibilities of Biodesign,” click on this link, or watch the embedded video below.

8373963850_148a524077_o.jpg
Picture from Fernan Federici on Flickr